Showing posts with label Cygnus. Show all posts
Sunday, September 17, 2017
Cygnus back on track
With the recent decommissioning of the Form1 and its replacement with a far more reliable and cheaper Chinese LCD printer, the CYGNUS level 2 extension project is back on track...
Friday, July 29, 2016
Cygnus Update
For those that are waiting for Cygnus upgrade parts, apologies for my absence. What have I been up to?
1) Bathroom renos
2) Checking out alternative resins. I've been making non-destructive tweaks to the Form1 to see if I can modify it to use DLP resins such as Makerjuice G+. Stay tuned, I should be sharing my secret in near future.
3) Pushing ahead with detailing strips, crowsnests and antennae bases for the Cygnus. Also tweaking the antenna for the Palomino.
4) Most importantly, this...
1) Bathroom renos
2) Checking out alternative resins. I've been making non-destructive tweaks to the Form1 to see if I can modify it to use DLP resins such as Makerjuice G+. Stay tuned, I should be sharing my secret in near future.
3) Pushing ahead with detailing strips, crowsnests and antennae bases for the Cygnus. Also tweaking the antenna for the Palomino.
4) Most importantly, this...
Tuesday, June 21, 2016
Saturday, June 11, 2016
Cygnus Landing Bay v1.0 Test Fit
After a bit of chopping, sanding and a really half-assed paintjob, here we are...
It turned out a couple of mm short and I don't like how thick the side walls are. Will be redesigning the wall parts today.
Sunday, June 5, 2016
Cygnus Landing Bay
I've worked out most of the bugs with printing the landing bay detail set. Here is a picture of the latest parts...
Only one fly in the ointment -- due to printing and design tolerances, etc etc, my bay is about 1.5 mm too narrow. I'm going to do a test build with the parts shown anyways to get an idea of how they fit together and paint up. Then I'll do some cutting on the Cygnus and figure out just how much I need to tweak the size.
Saturday, May 28, 2016
Tuesday, May 17, 2016
More Cygnus Pictures
Not much to say, just some pictures of the LEVEL 2 expansion section. Will need to alter some of the support structure for the print job and reroute a little on the piping, but the design is pretty much done for this bit. Now on to the landing bay...
Monday, May 16, 2016
Sunday, May 8, 2016
Cygnus Update
So here's what I'm calling the LEVEL 1 Cygnus extension kit:
LEVEL 3 - No doubt I will discover bits and pieces along the way that I want to add. These parts will become part of the level 3 expansion kit. Also, if you wish to acquire any parts "a la carte", get in touch and I'll work out a price... bverde84 atsign hotmail dawt com
It consists of 9 parts; a hull extension, two top panels, two side panels, two piping standoffs, a piping extension and two nose detail pieces. Cost is a little higher than expected at $63USD. It will enable the kit builder to implement the extension with parts that are consistent in detail with existing kit and required little cutting.
HOWEVER, you may wish to wait to see how the LEVEL 2 parts turn out before committing. At the moment, my plan is to include two detailed hull extensions (shown below), an upgraded landing bay and Palomino, additional lattice detailing for the spine and sides of the ship and upgraded antennas -- everything that I can think of at the start of my build. This set will likely be around $120USD
LEVEL 3 - No doubt I will discover bits and pieces along the way that I want to add. These parts will become part of the level 3 expansion kit. Also, if you wish to acquire any parts "a la carte", get in touch and I'll work out a price... bverde84 atsign hotmail dawt com
Sunday, May 1, 2016
Cygnus Level 1 Update
This week I updated the body extension section (removed piping standoff) and printed two piping standoffs for the original section. These and the side panel extensions are shown here:
I also printed a pair of lattice pieces for the nose, but they were too thin and flimsy, will redo those today.
Regarding the necessary extension to the piping rails, I WAS just going to say "screw it, make your own", but there's no sprue in this kit that matches. So I'll also include a piece for that. Also working on that today.
I also printed a pair of lattice pieces for the nose, but they were too thin and flimsy, will redo those today.
Regarding the necessary extension to the piping rails, I WAS just going to say "screw it, make your own", but there's no sprue in this kit that matches. So I'll also include a piece for that. Also working on that today.
Tuesday, April 26, 2016
How far do you want to go?
So far I've been designing extension parts for the CYGNUS that match the body as it currently exists. But I'm considering some further modifications.
Off the top, I'm thinking about redesigning the extension section to have more authentic, open girderwork on the outside and more detailing on the tanks and piping... something like this. Only problem is if I upgrade A and B, then I have to do an upgrade section for the back of the hull as well for section C. Easily duplicated in CAD, but will add to the cost.
I'm thinking about making some detail sections to stick to the front of the mandibles (E).
Also thinking about chopping the antennae bases off (D) and replacing the antennaes with more accurate parts.
Not shown here, I have side panel exztensions for A + B that are working pretty well. Will post those in a bit.
I think what I will do in the end, is I will produce a level one and level two upgrade kit. Level one will be consistent with the current hull and will cost $50. Level two upgrades will be more dramatic and will require a lot more cutting... also slightly more expensive.
Feed back? Tim? Ford?
Off the top, I'm thinking about redesigning the extension section to have more authentic, open girderwork on the outside and more detailing on the tanks and piping... something like this. Only problem is if I upgrade A and B, then I have to do an upgrade section for the back of the hull as well for section C. Easily duplicated in CAD, but will add to the cost.
I'm thinking about making some detail sections to stick to the front of the mandibles (E).
Also thinking about chopping the antennae bases off (D) and replacing the antennaes with more accurate parts.
Not shown here, I have side panel exztensions for A + B that are working pretty well. Will post those in a bit.
I think what I will do in the end, is I will produce a level one and level two upgrade kit. Level one will be consistent with the current hull and will cost $50. Level two upgrades will be more dramatic and will require a lot more cutting... also slightly more expensive.
Feed back? Tim? Ford?
Sunday, April 24, 2016
Cygnus Extension Parts
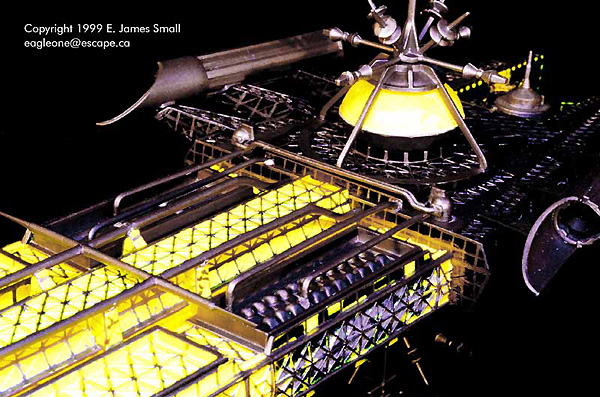
So you're building the MPC Cygnus from Disney's The Black Hole, but you want to be cool like James Small and add the missing hull section like this (I've always liked this build).
It'd be a shame to have to cannibalize a second kit to do this. Also potentially a bit expensive. That's why I've been working on a set of 3D printed extension parts.
I'm printing the side panel extensions today. Before too long I should have these selling on e-bay, or you can contact me directly at bverde84 atsign hotmail dawt com if you are interested in a set of extension parts. Final pricing is yet to be determined, but I expect to be around $50-60USD
Subscribe to:
Posts (Atom)